How to Turn an Image into a Video with Seedance 2.0 (I2V)
You have the perfect image. Now, you need it to move perfectly. Seedance 2.0 has become the go-to for creators aiming for viral, high-consistency animation, but it has a steep learning curve.
If you want to avoid "motion break" and achieve fluid, realistic movement in seconds, you need a system. This guide covers the essential steps to master Seedance 2.0 and how to use these clips to build high-converting content.
But here's the reality: even flawless Seedance generations need a finishing layer. Most creators waste 3+ hours manually syncing captions, trimming artifacts, and exporting for multiple platforms. Smart teams skip that grind entirely; they route raw AI clips straight into NemoVideo's AI Workspace and ship platform-ready posts in under 10 minutes.
What image-to-video actually controls in real projects
In traditional AI video, you’d cross your fingers and hope the AI didn't turn your subject into a glitchy mess. With Seedance 2.0, that "black box" approach is over. For the first time, creators have surgical control over the three pillars of video production: motion, camera, and consistency.
Here is what you can actually control in a professional workflow:
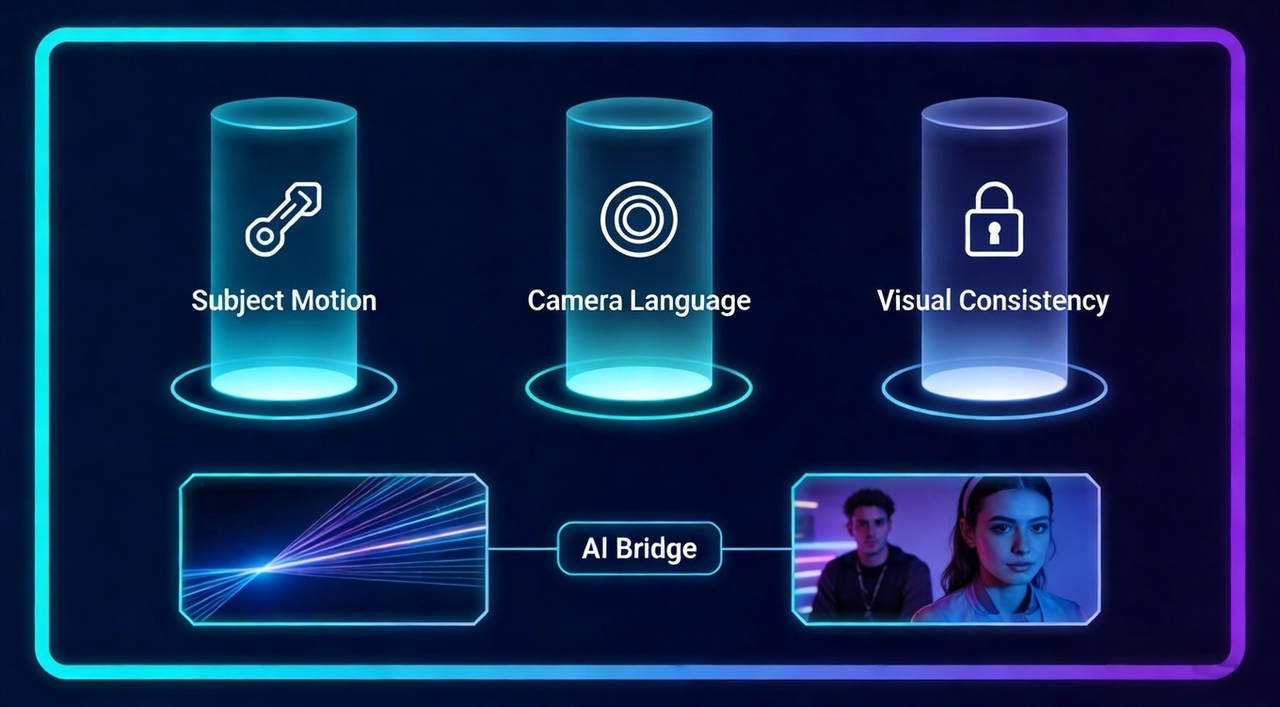
Subject Motion: You can define exactly how your subject moves. Whether it’s a slow-motion pour of coffee or a high-speed car chase, the AI follows your motion prompts with physics-based realism.
Camera Language: You are the director. You can command specific cinematic moves like a dolly zoom, a smooth pan, or a handheld shake. This ensures your AI clips don't just look like moving photos—they look like shots from a movie set.
Visual Consistency: One of the biggest wins in Seedance 2.0 is keeping your character's face and product details identical from the first frame to the last. This is crucial for brand-safe content where a logo or a mascot cannot change shape.
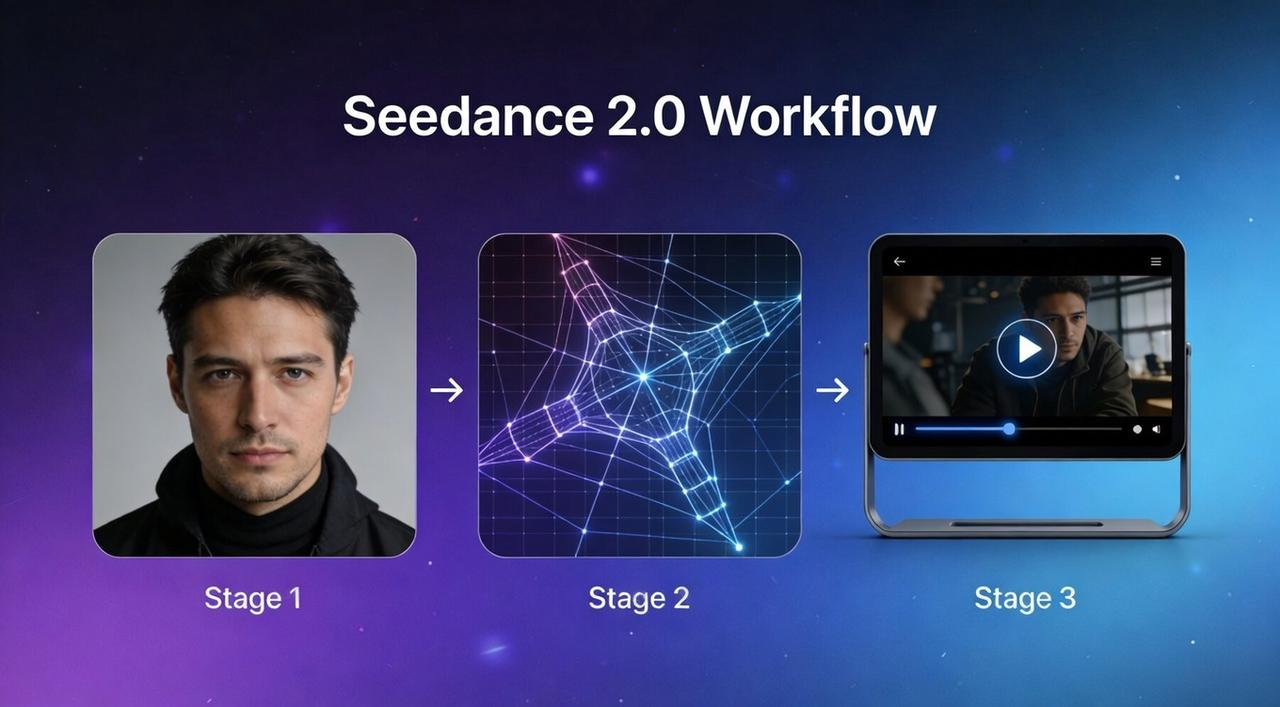
First and Last Frame Precision: By using the @image reference system, you can upload a starting image and an ending image. The AI then "bridges" the gap, giving you a predictable narrative arc instead of a random sequence.
By mastering these controls, you move from "generating" to "filming." However, even the most perfect AI clip is just a raw ingredient.
To turn these Seedance generations into a finished, platform-ready story, you need an editor that matches this level of precision. This is why many creators use NemoVideo, a professional AI video editor designed to handle raw AI outputs.
While Seedance 2.0 gives you control over the pixels, NemoVideo gives you control over the timeline, allowing you to refine your AI clips, add smart captions, and eliminate any remaining "AI randomness" before you hit publish.
Choosing images that animate well vs images that break motion
Not every beautiful AI image is meant to be a video. If your source image is a "mess" of details, the AI will struggle to understand what should move and what should stay still. To save your credits and time, you need to pick motion-ready images.
What Animates Well (The "Safe" Zone)
Clear Silhouettes: A single subject (person, car, animal) with a distinct outline against the background.
Simple Environments: Clean backgrounds like a sky, a desert, or a studio wall allow the AI to focus on the subject's movement.
Logical Physics: Images where the weight and posture are clear. For example, a person standing firmly is easier to animate than someone mid-air in a complex yoga pose.
High Contrast: When the subject "pops" out from the background, Seedance 2.0 can easily apply first frame control without blurring the edges.
What Breaks Motion (The "Glitch" Zone)
Intertwined Limbs: Multiple people hugging or complex finger positions often lead to "extra arms" or melting skin.
Tiny Text & Fine Patterns: AI struggles with small text on clothing or intricate lace patterns. These will likely flicker or warp.
Crowded Scenes: Too many subjects moving in different directions usually cause the background to "melt."
Extreme Perspectives: Top-down or "fisheye" shots often confuse the AI's understanding of depth during animation.
Pro Tip: If you have an image that is "borderline," try using NemoVideo’s smart crop or background removal tools first. By simplifying the visual input, you give the Seedance engine a much easier job.
🚀 Start optimizing your images in NemoVideo—no manual editing required.
Using subject–motion–camera prompts to guide movement
Once you have the perfect image, your motion prompt is the steering wheel. In Seedance 2.0, a "good" prompt isn't just a description—it’s a formula. To get cinematic results, use the S-M-C (Subject-Motion-Camera) framework:
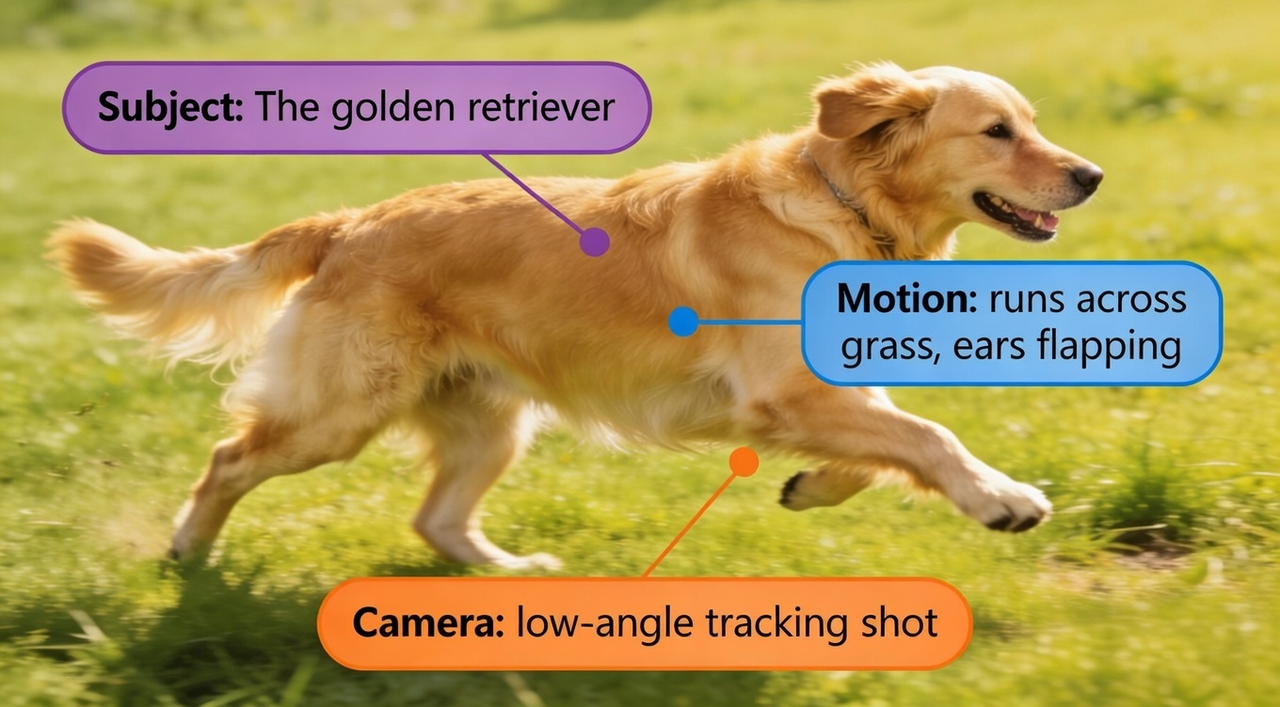
Subject: Identify who or what is moving. (e.g., "The golden retriever")
Motion: Describe the specific action. (e.g., "runs across the grass, ears flapping")
Camera: Direct the "lens" movement. (e.g., "slow tracking shot from the side")
Example of a weak prompt:
"A dog running." (Too vague, leads to random AI "guessing.")
Example of a strong S-M-C prompt:
"Subject: The golden retriever, Motion: runs across the grass with ears flapping in the wind, Camera: low-angle tracking shot, 4k cinematic."
By combining first frame control with a specific S-M-C prompt, you reduce the "AI randomness" that ruins most I2V workflows. You aren't just asking the AI to "do something"; you are giving it a storyboard.
⚡ WORKFLOW SHORTCUT FOR SEEDANCE USERS
You've nailed the S-M-C prompt. Now what?
Most creators hit a wall after generation, manually layering captions, sound, and B-roll for each platform.
Automate the entire post-production pipeline:
• Upload raw Seedance clips to NemoVideo Workspace
• Use Talk-to-Edit to add viral captions in 1 command
• Export 9:16 (TikTok), 16:9 (YouTube), 1:1 (IG) versions
→ Launch your first project in Workspace (no card required)
Common I2V failure patterns and how to fix them
If your video looks like a "fever dream" rather than a cinematic masterpiece, don't worry—you aren't alone. Most I2V failures come down to a few predictable patterns. Here is how to spot them and, more importantly, how to fix them.
The "Melting" Subject (Motion Break)
The Problem: Your character starts moving, but their features morph or their limbs "melt" into the background as the animation progresses.
The Fix: Use the @Tag system in Seedance 2.0. By labeling your input as
and prompting "Keep the identity of @Image1 consistent," you anchor the AI's focus.@Image1Pro Tip: Try reducing the Motion Slider slightly; lowering the intensity helps the AI maintain the structural integrity of your subject's anatomy throughout the clip.
Background "Shimmer" or Flickering
The Problem: The subject looks great, but the trees, buildings, or textures in the background are vibrating—usually because the background is too "busy" or detailed for the AI to track.
The Fix: Add "static background" or "locked-off camera" to your prompt to stabilize the environment.
Many creators route Seedance clips directly into NemoVideo's Talking-Head Editor, which automatically isolates subjects and removes background flicker, no masking required. One command ("stabilize background") executes what would take 20 minutes in Premiere.
Try Talk-to-Edit for free and fix flickering backgrounds in seconds.
"Floaty" Physics
The Problem: Objects appear to be sliding across the screen rather than interacting with the ground (e.g., a car that looks like it's hovering over the road).
The Fix: Add "weight" to your S-M-C prompts. Use specific sensory keywords like "tires spinning on asphalt" or "feet creating dust on the path." This gives the AI's physics engine the context it needs to create realistic friction.
The "Unfinished" Raw Clip
The Problem: You have a visually stunning 10-second clip, but it feels "hollow" or unprofessional because it lacks sound and a narrative hook.
The Fix: A raw Seedance clip is just an ingredient; the final "dish" is made in the edit. To move from a raw generation to a viral-ready post, use NemoVideo’s Talk-to-Edit co-pilot to bridge the gap. Instead of manual sound design, you can simply chat with the editor to "Add cinematic engine revving sounds" or "Insert trending captions with a 71% hook rate." This integrates the visual power of Seedance with the engagement-focused tools needed for social platforms.
👉 Start your free trial and see how NemoVideo turns AI clips into viral posts.
From raw clip to viral post with NemoVideo
Instead of spending hours manually layering effects, bring your Seedance clip into NemoVideo and finish it in minutes:
Instead of spending hours manually layering sound, captions, and effects, bring your Seedance clip into NemoVideo and let conversational editing do the heavy lifting:
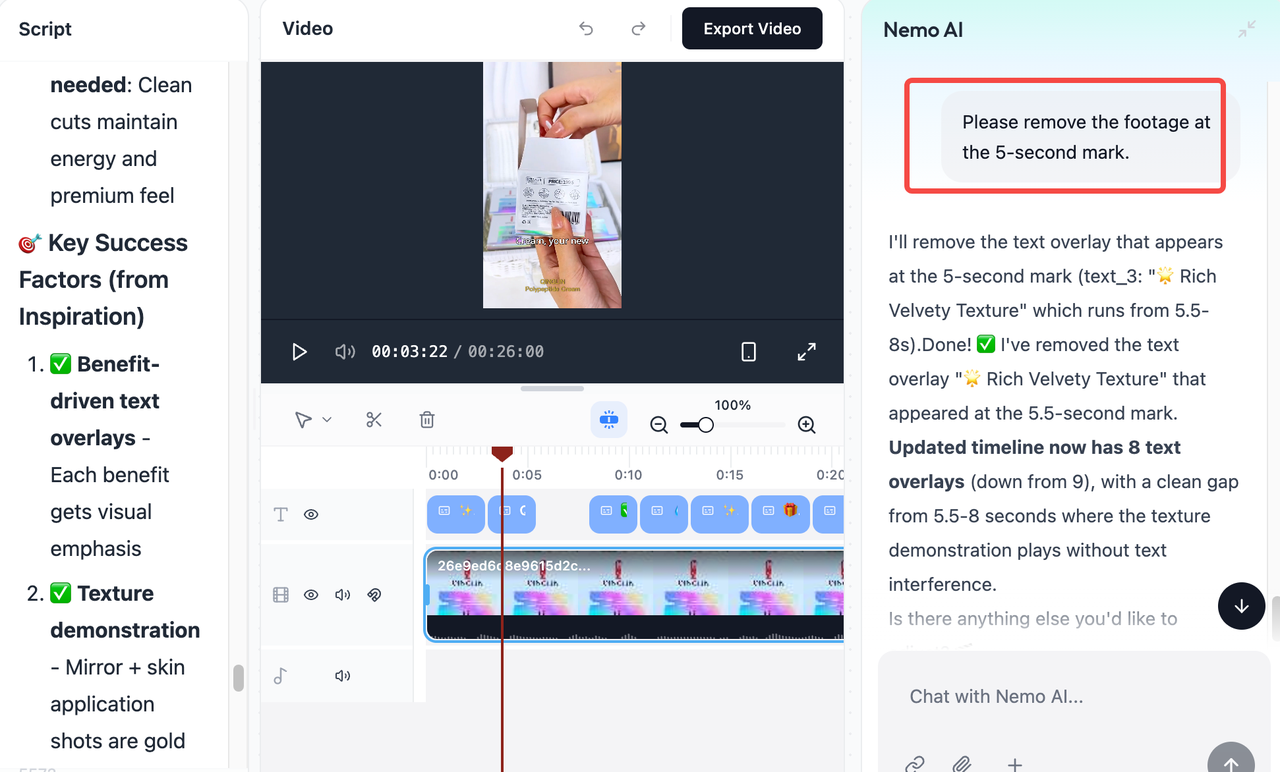
Import your clip → NemoVideo's Workspace automatically analyzes the content
Talk-to-Edit → Tell the AI what you need ("Add engine sounds," "Insert captions," "Trim the glitch at the end"), and it executes each request instantly
Inspiration Center → NemoVideo reverse-engineers viral video patterns and applies proven hook structures and pacing logic to your clip
Platform optimization → Generate TikTok (9:16), YouTube Shorts (16:9), and Instagram (1:1) versions with one command
Ready to turn your Seedance clips into scroll-stopping content?
Stop wasting hours on manual edits. NemoVideo's AI-powered workflow takes your raw AI generations and transforms them into platform-optimized, viral-ready videos in minutes—no timeline wrestling, no guesswork.
Start creating with NemoVideo for free →
SHIP 10X FASTER WITH AI POST-PRODUCTION
Most creators spend 4+ hours per Seedance clip manually adding captions, B-roll, and audio. That's 28 hours/week you'll never get back.
NemoVideo automates the entire finishing workflow:
✓ Talk-to-Edit co-pilot executes edits via chat commands
✓ Smart Caption applies viral subtitle styles in 1 click
✓ Viral+ Studio reverse-engineers top-performing pacing
✓ Auto-export to TikTok (9:16), YouTube (16:9), IG (1:1)
→ Launch your first AI-powered workflow in Workspace